Working Environment
After logging in to JupyterHub.nrw, you can select the required resources (e.g., CPU and RAM) as well as a suitable working environment on the Spawn page.
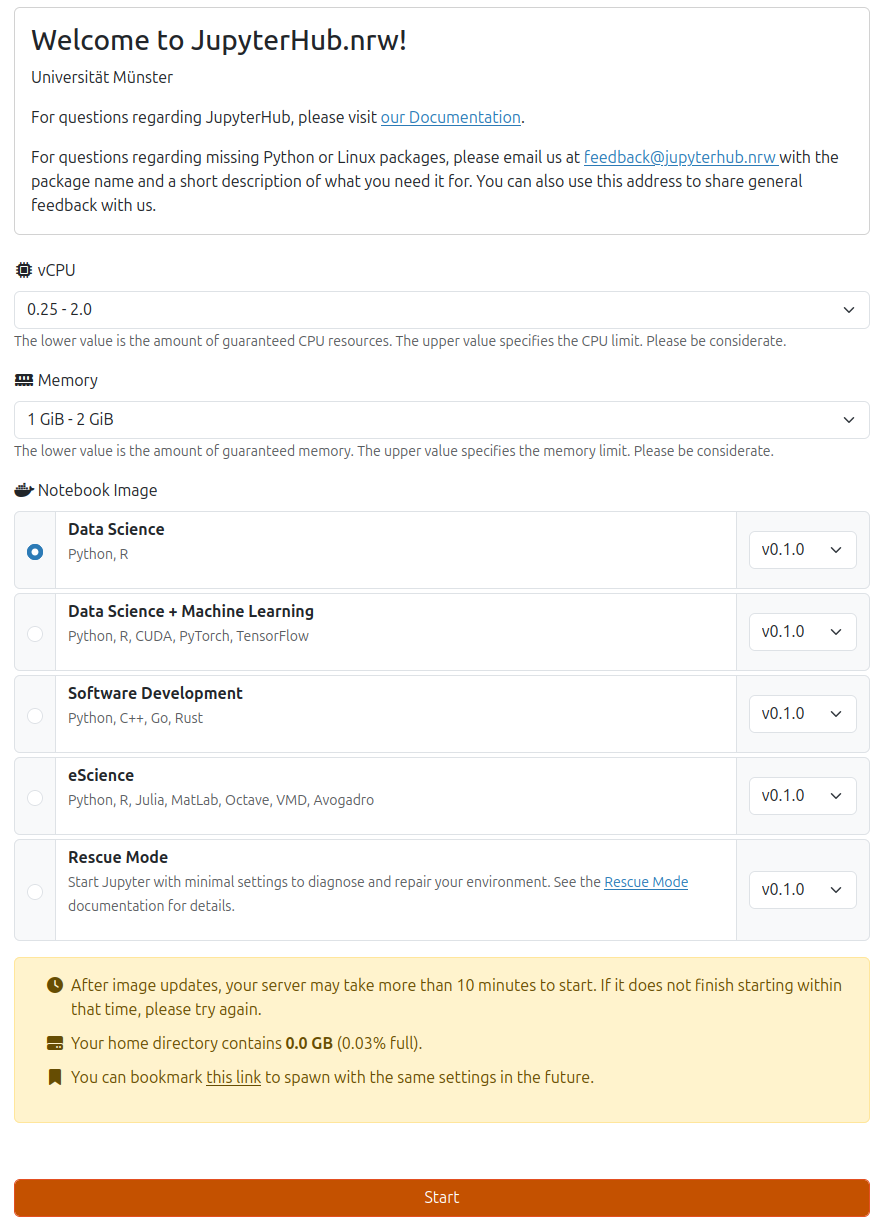
Resource Quotas
Resource quotas depend on the user’s status and user group. Higher resource quotas of up to 16 virtual CPUs (vCPUs), 64 GB of RAM, and additional graphics processing units (GPUs) can be requested through our support-Team.
Selecting vCPU Resources
This is where you specify the processor performance (minimum guaranteed, maximum possible).
- 0.25 - 2.0 vCPU: for quick tests, Jupyter notebooks, simple Python scripts, analysis with small datasets (<100 MB)
- 0.5 - 4.0 vCPU: scientific computations, training small machine learning models, medium-sized datasets (0.1 - 1.0 GB),
- 1.0 - 8.0 vCPU: simulations (e.g., Monte Carlo), deep learning, larger datasets (>1.0 GB)
Selecting RAM
Here, the selection depends on the size of the data and the computational tasks.
Need more compute power or external storage?
Please refer to FAQ for the answer to this question.
Supported Environments (Notebook Images)
Various configurations (notebook images) are available for different purposes. Depending on the image you choose, different programs and packages are preinstalled. The following notebook images are currently available:
Data Science
A data analysis and visualization environment.
- Python: NumPy, Pandas, SciPy, Matplotlib, Seaborn, Bokeh, Plotly, scikit-learn, statsmodels
- R: RStudio, Shiny Server, tidyverse ecosystem
- Tools: VS Code Server, OpenRefine (data cleaning), full LaTeX stack
Data Science + Machine Learning
Extends the Data Science image with GPU-accelerated machine learning frameworks.
- Deep Learning: PyTorch, TensorFlow, JAX
- GPU Support: CUDA 11.8, cuDNN
Suitable for deep learning, neural networks, and compute-intensive model training.
Software Development
A multi-language development environment.
- C/C++: GCC 13, Clang 18, Xeus Cling (interactive kernel), CMake, GoogleTest
- Rust: Full toolchain with Jupyter kernel
- Go: Go 1.24 with Gophernotes kernel
- Java: OpenJDK 17
- Scheme: Calysto Scheme kernel
- Tools: VS Code Server, full LaTeX stack, SSH tools
Rescue Mode
A minimal recovery environment. Use it when your JupyterLab environment does not start, for example due to broken packages or corrupted configuration files. Provides basic file management tools to inspect and repair your home directory. See Rescue Mode for details.
Starting a server with Sciebo access
JupyterHub.nrw can mount your Sciebo files directly into your Jupyter server. To use this feature, enable the Sciebo option on the spawn page.
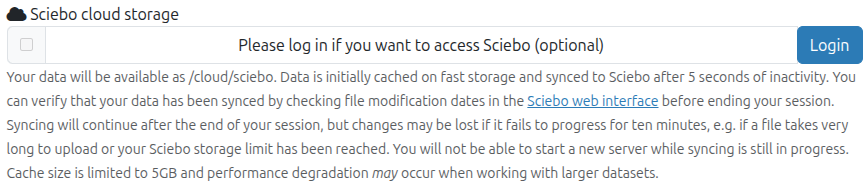
If your Sciebo account is not connected yet, the Sciebo checkbox is inactive and a Login button is shown at the right side of the Sciebo option. Click Login to connect your Sciebo account.
For more information about the Sciebo integration, see Sciebo Integration.
Starting the Server
After selecting the resources and image, click the "Start" button to begin the server. Please note that it may take a while for the JupyterLab environment to be ready.
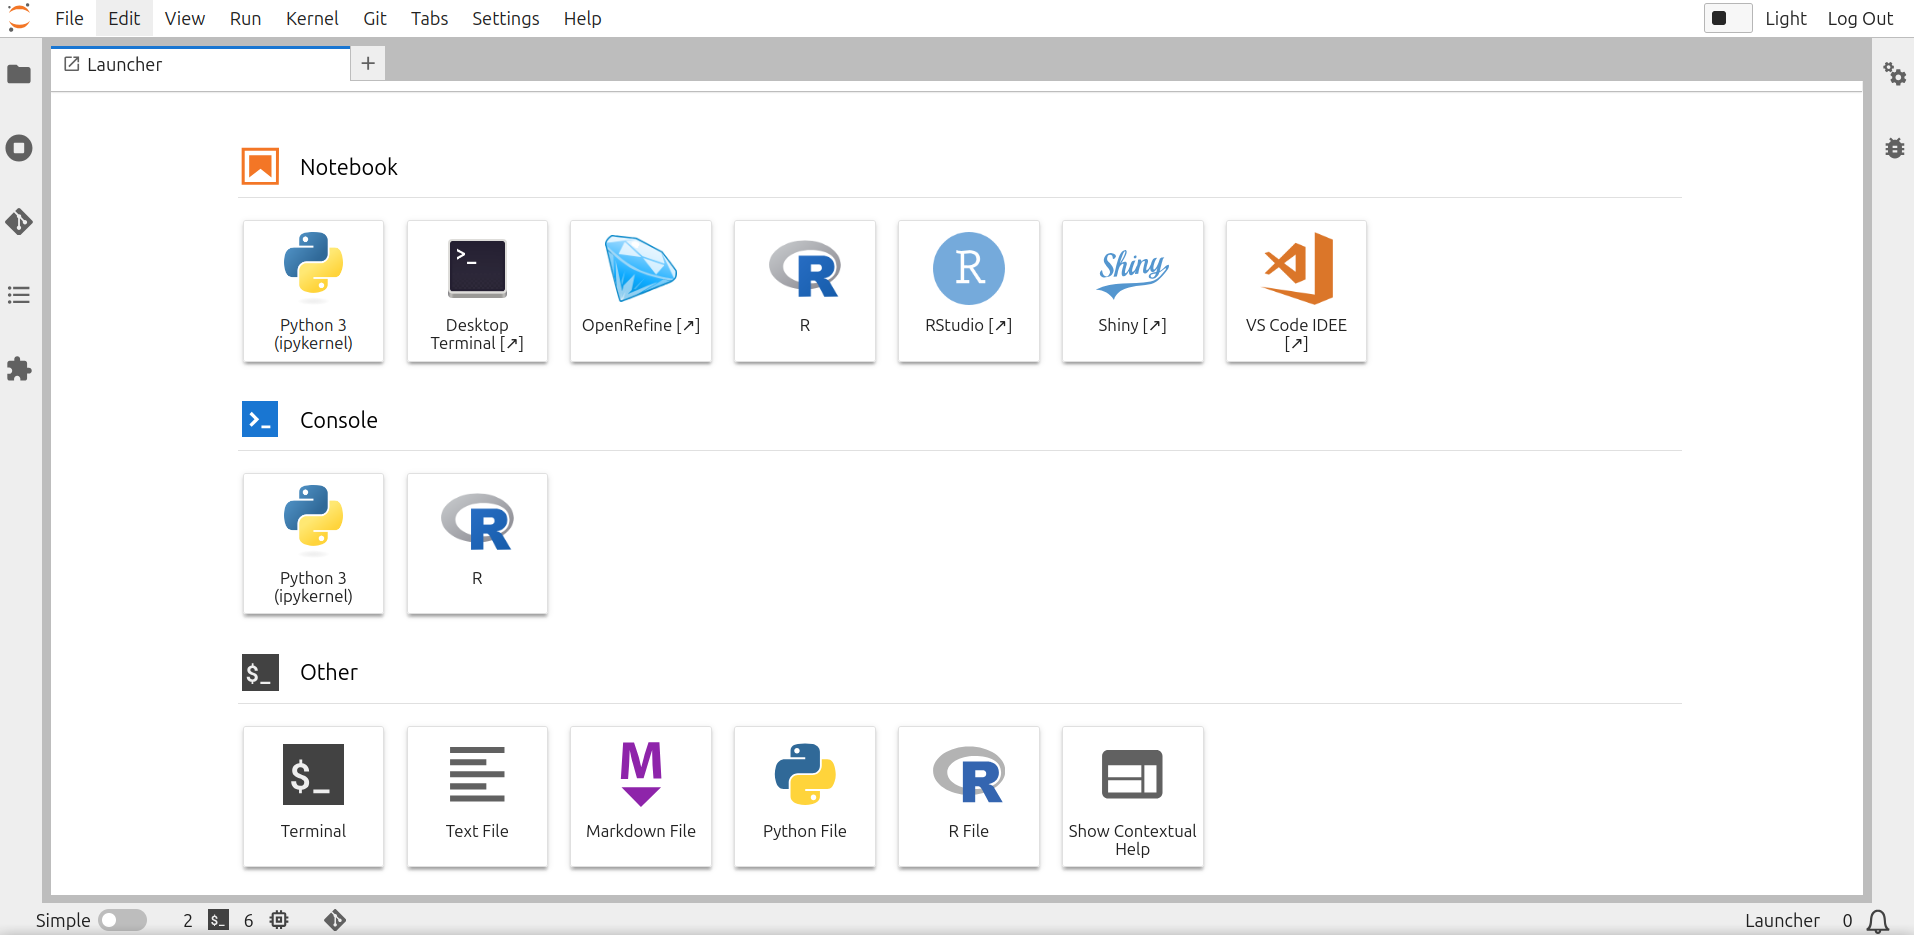
If you have trouble starting your server, see Rescue Mode and Log Viewer.
JupyterLab Interface
On the left side of the JupyterLab-Environment is the dashboard, which has five tabs. On the right side is the launcher. This allows you to select and launch different programming environments directly.
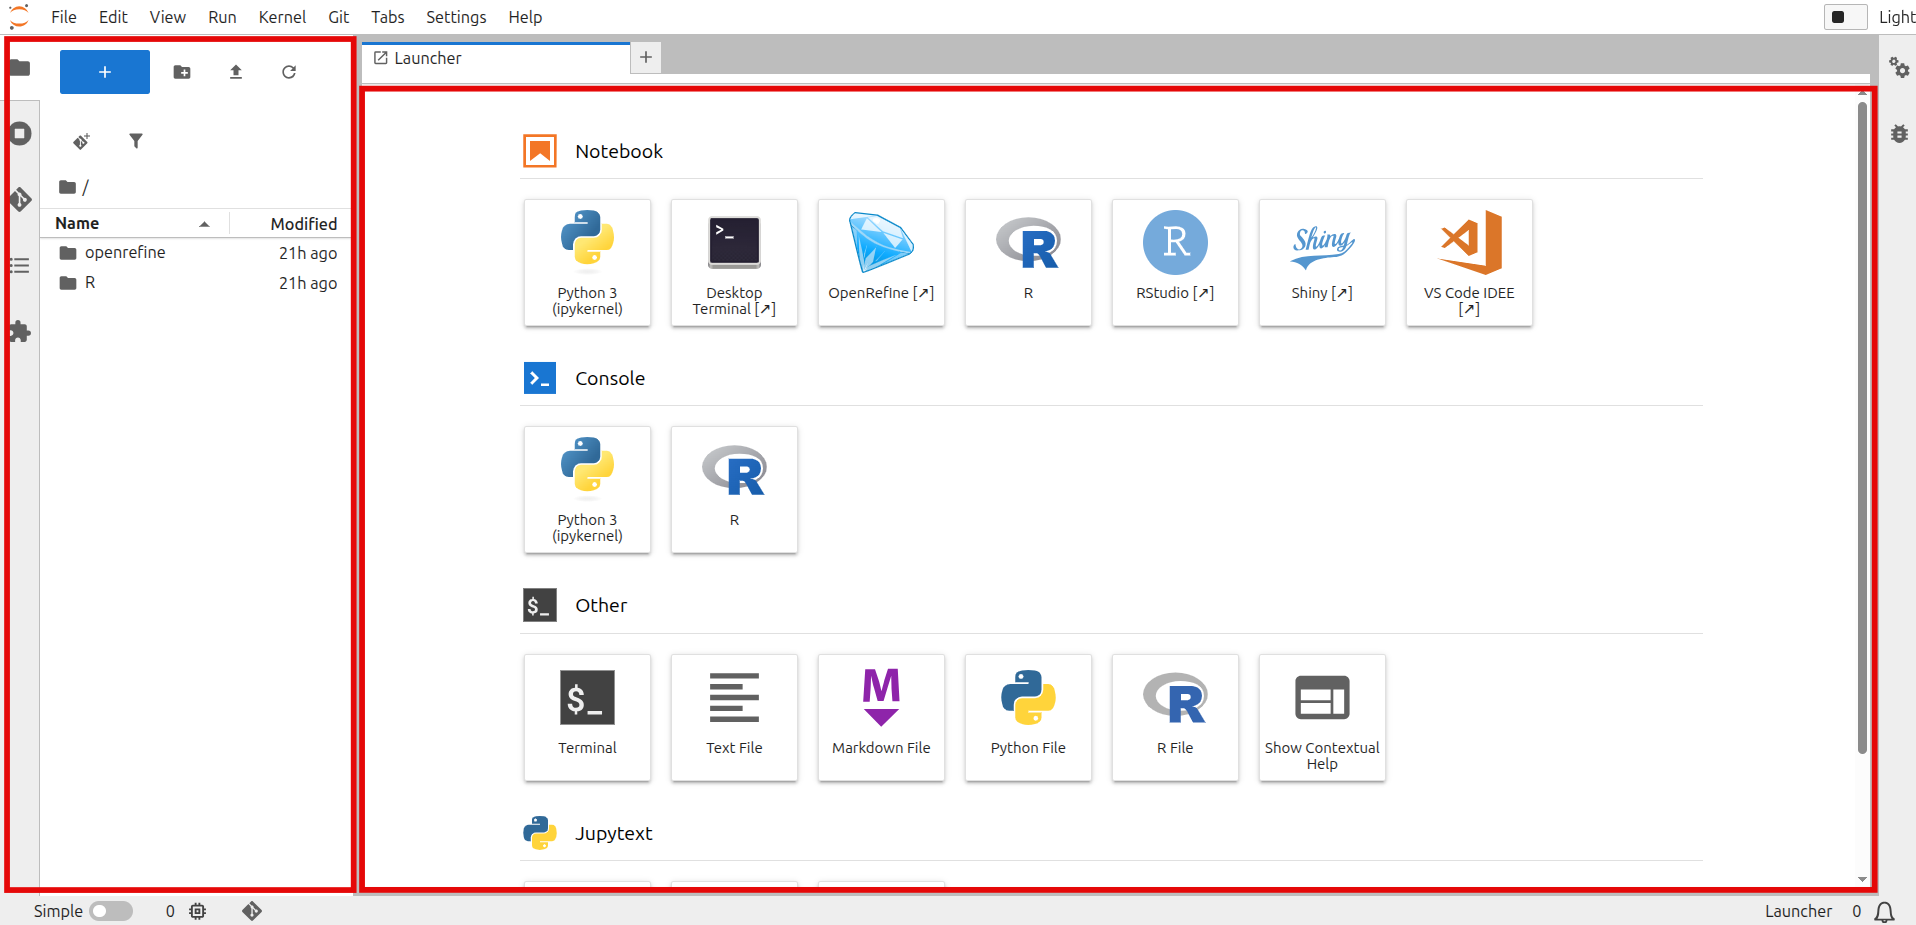
The first of the five tabs contains the file browser (see symbol:  ), which provides an overview of created notebooks, folders, and other files. To the right of it is the New Launcher button (see symbol:
  ) allows you to create new files/notebooks or launch consoles. New folders can be added using the New Folder button (see symbol:
  ), while files can be uploaded using the Upload Files button (see Symbol:
  ). Note: Files can also be dragged and dropped into the directory. The file view can be refreshed using the Refresh File Browser button (see Symbol:
  ). A file is opened by double-clicking it. Files can be edited via the context menu (right-click), for example by renaming, deleting, or copying them. You can also create new notebooks or folders by right-clicking on the file browser.
Changing the Working Environment
To start a different image, first stop the server, then restart it. To do so, click the "Stop Server" button in the upper right corner of JupyterLab.
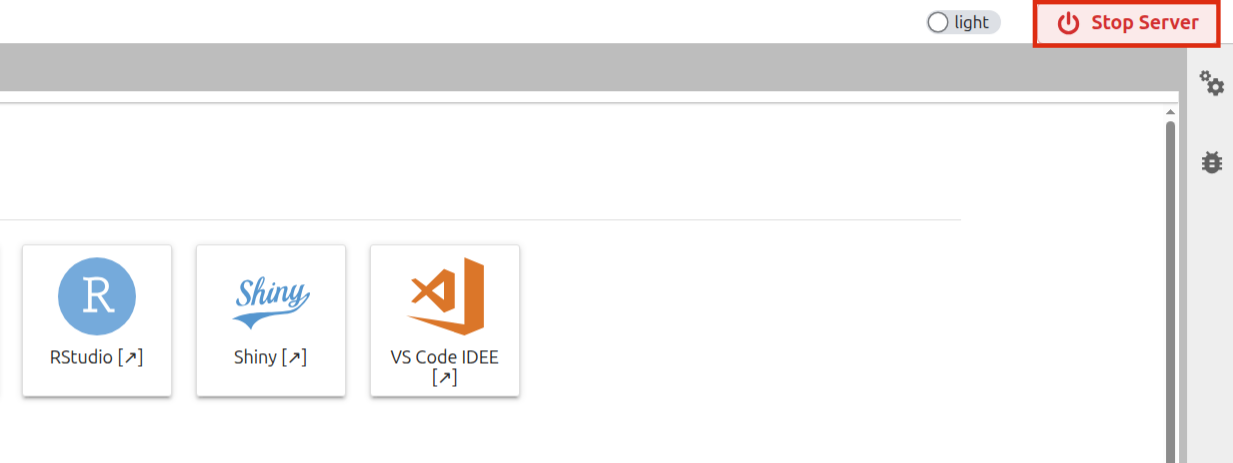
Then, a window message will appear in JupyterLab where you will need to confirm that your server can be stopped.
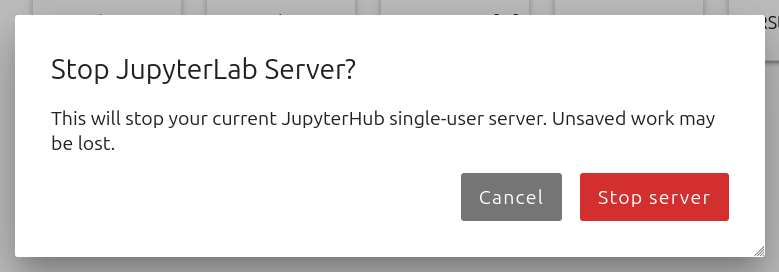
After confirming, you will be redirected to the Hub Home, where you can start your server again.

Further Information
For information on installing specific packages, see the Custom Environments section.
Useful links for using JupyterLab and Jupyter Notebooks